Introduction
How to call Api controller action from server side blazor Net Core?
In this article, we will create a Single Page Application (SPA) using the server-side Blazor concepts with the help of Entity Framework Core database first approach. Single-Page Applications are web applications that load a single HTML page and dynamically update that page as the user interacts with the app.
We will be creating a sample Employee Record Management System and perform CRUD operations on it. A modal popup will display the form to handle the user inputs and the form also has a dropdown list, which will bind to a database table. We will also provide a filter option to the user to filter the employee records based on employee name.
We will be using Visual Studio 2019 and SQL Server 2017 for our demo.

step 1.Create Server Side Blazor Application
Open Visual Studio and select File >> New >> Project.

Step 2.Creating Directory for the Application
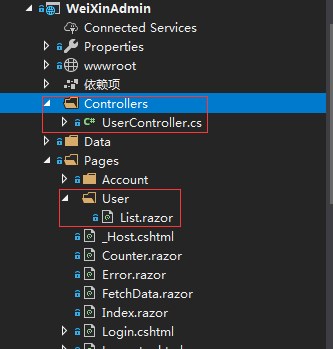
step 3. Creating the WEB API Controllers
using System;
using System.Collections.Generic;
using System.Linq;
using System.Threading.Tasks;
using Microsoft.AspNetCore.Mvc;


namespace WeiXinAdmin.Controllers
{
    [Route("api/[controller]")]
    [ApiController]
    public class UserController : Controller
    {
        // GET: api/<controller>
        [HttpGet]
        public IEnumerable<string> Get()
        {
            return new string[] { "value1", "value2" };
        }

        // GET api/<controller>/5
        [HttpGet("{id}")]
        public string Get(int id)
        {
            return "value";
        }

        // POST api/<controller>
        [HttpPost]
        public void Post([FromBody]string value)
        {
        }

        // PUT api/<controller>/5
        [HttpPut("{id}")]
        public void Put(int id, [FromBody]string value)
        {
        }

        // DELETE api/<controller>/5
        [HttpDelete("{id}")]
        public void Delete(int id)
        {
        }
    }
}
step 4. Creating the View Component
@page "/Pages/User/List"

<h3>List</h3>

@code {

}
step 5.Configure web api Controllers access for the Application
   public void Configure(IApplicationBuilder app, IWebHostEnvironment env)
        {
            if (env.IsDevelopment())
            {
                app.UseDeveloperExceptionPage();
            }
            else
            {
                app.UseExceptionHandler("/Error");
            }

            app.UseStaticFiles();

            app.UseRouting();

            // ******
            // BLAZOR COOKIE Auth Code (begin)

            app.UseStaticFiles();
            app.UseCookiePolicy();
            app.UseAuthentication();
            app.UseAuthorization();
            // BLAZOR COOKIE Auth Code (end)
            // ******

            app.UseEndpoints(endpoints =>
            {
                endpoints.MapControllers();//add here
                endpoints.MapBlazorHub();
                endpoints.MapFallbackToPage("/_Host");
            });
        }
Access web api the Application

step 6.create a custom HttpClient class for the Application
currently HttpClient class doesn’t contain “GetJsonAsync”, “PostJsonAsync”, and “PutJsonAsyc” methods.
We can create a custom HttpClient class to add these missing methods to handle json data.
\src\Presentation\WeiXinAdmin\Data\CustomHttpClient.cs
using Newtonsoft.Json;
using System.Net.Http;
using System.Text;
using System.Threading.Tasks;


namespace WeiXinAdmin.Data
{
    public class CustomHttpClient : HttpClient
    {
        public async Task<T> GetJsonAsync<T>(string requestUri)
        {
            HttpClient httpClient = new HttpClient();
            var httpContent = await httpClient.GetAsync(requestUri);
            string jsonContent = httpContent.Content.ReadAsStringAsync().Result;
            T obj = JsonConvert.DeserializeObject<T>(jsonContent);
            httpContent.Dispose();
            httpClient.Dispose();
            return obj;
        }
        public async Task<HttpResponseMessage> PostJsonAsync<T>(string requestUri, T content)
        {
            HttpClient httpClient = new HttpClient();
            string myContent = JsonConvert.SerializeObject(content);
            StringContent stringContent = new StringContent(myContent, Encoding.UTF8, "application/json");
            var response = await httpClient.PostAsync(requestUri, stringContent);
            httpClient.Dispose();
            return response;
        }
        public async Task<HttpResponseMessage> PutJsonAsync<T>(string requestUri, T content)
        {
            HttpClient httpClient = new HttpClient();
            string myContent = JsonConvert.SerializeObject(content);
            StringContent stringContent = new StringContent(myContent, Encoding.UTF8, "application/json");
            var response = await httpClient.PutAsync(requestUri, stringContent);
            httpClient.Dispose();
            return response;
        }
    }
}
step 7.Creating Data Access Layer for the Application
Right-click on ServerSideSPA.App project and then select Add >> New Folder and name the folder as DataAccess. We will be adding our class to handle database related operations inside this folder only.using Microsoft.EntityFrameworkCore;
using ServerSideSPA.App.Models;
using System;
using System.Collections.Generic;
using System.Linq;
using System.Threading.Tasks;
namespace ServerSideSPA.App.DataAccess
{
public class EmployeeDataAccessLayer
{
myTestDBContext db = new myTestDBContext();
//To Get all employees details
public List<Employee> GetAllEmployees()
{
try
{
return db.Employee.AsNoTracking().ToList();
}
catch
{
throw;
}
}
//To Add new employee record
public void AddEmployee(Employee employee)
{
try
{
db.Employee.Add(employee);
db.SaveChanges();
}
catch
{
throw;
}
}
//To Update the records of a particluar employee
public void UpdateEmployee(Employee employee)
{
try
{
db.Entry(employee).State = EntityState.Modified;
db.SaveChanges();
}
catch
{
throw;
}
}
//Get the details of a particular employee
public Employee GetEmployeeData(int id)
{
try
{
var employee = db.Employee.Find(id);
db.Entry(employee).State = EntityState.Detached;
return employee;
}
catch
{
throw;
}
}
//To Delete the record of a particular employee
public void DeleteEmployee(int id)
{
try
{
Employee emp = db.Employee.Find(id);
db.Employee.Remove(emp);
db.SaveChanges();
}
catch
{
throw;
}
}
// To get the list of Cities
public List<Cities> GetCityData()
{
try
{
return db.Cities.ToList();
}
catch
{
throw;
}
}
}
} step 8.Creating the Service class
Right click on Services folder and select Add >> Class. Give the name of the class as “EmployeeService.cs” and click Add. This will add the EmployeeService class to the Services folder.using ServerSideSPA.App.DataAccess;
using ServerSideSPA.App.Models;
using System;
using System.Collections.Generic;
using System.Linq;
using System.Threading.Tasks;
namespace ServerSideSPA.App.Services
{
public class EmployeeService
{
EmployeeDataAccessLayer objemployee = new EmployeeDataAccessLayer();
public Task<List<Employee>> GetEmployeeList()
{
return Task.FromResult(objemployee.GetAllEmployees());
}
public void Create(Employee employee)
{
objemployee.AddEmployee(employee);
}
public Task<Employee> Details(int id)
{
return Task.FromResult(objemployee.GetEmployeeData(id));
}
public void Edit(Employee employee)
{
objemployee.UpdateEmployee(employee);
}
public void Delete(int id)
{
objemployee.DeleteEmployee(id);
}
public Task<List<Cities>> GetCities()
{
return Task.FromResult(objemployee.GetCityData());
}
}
} At this point in time, the ServerSideSPA.App project has the following structure.

Configuring the Service
To make the service available to the components we need to configure it on the server side app. Open ServerSideSPA.App >> Startup.cs file. Add the following line inside the ConfigureServices method of Startup class.- services.AddSingleton<EmployeeService>();

Creating the View Component
We will add the Razor page in ServerSideSPA.App/Pages folder. By default, we have “Counter” and “Fetch Data” pages provided in our application. These default pages will not affect our application but for the sake of this tutorial, we will delete fetchdata and counter pages fromServerSideSPA.App/Pages folder.
Right-click on ServerSideSPA.App/Pages folder and then select Add >> New Item. An “Add New Item” dialog box will open, select "ASP.NET Core" from the left panel, then select “Razor Page” from templates panel and name it EmployeeData.cshtml. Click Add.

This will add an EmployeeData.cshtml page to the Pages folder. This razor page will have two files, EmployeeData.cshtml and EmployeeData.cshtml.cs.
Now, we will add codes to these pages.
EmployeeData.cshtml
Open EmployeeData.cshtml page and put the following code into it.
- @page "/fetchemployee"
- @inherits EmployeeDataModel
- <h1>Employee Data</h1>
- <p>This component demonstrates CRUD operation on Employee data</p>
- <div>
- <div style="float:left">
- <button class="btn btn-primary" onclick="@AddEmp">Add Employee</button>
- </div>
- <div style="float:right; width:40%;">
- <div class="col-sm-6" style="float:left">
- <input class="form-control" type="text" placeholder="Search" bind="@SearchString" />
- </div>
- <div>
- <button type="submit" class="btn btn-default btn-info" onclick="@FilterEmp">Filter</button>
- </div>
- </div>
- </div>
- @if (empList == null)
- {
- <p><em>Loading...</em></p>
- }
- else
- {
- <table class='table'>
- <thead>
- <tr>
- <th>ID</th>
- <th>Name</th>
- <th>Gender</th>
- <th>Department</th>
- <th>City</th>
- </tr>
- </thead>
- <tbody>
- @foreach (var emp in empList)
- {
- <tr>
- <td>@emp.EmployeeId</td>
- <td>@emp.Name</td>
- <td>@emp.Gender</td>
- <td>@emp.Department</td>
- <td>@emp.City</td>
- <td>
- <button class="btn btn-default" onclick="@(async () => await EditEmployee(@emp.EmployeeId))">Edit</button>
- <button class="btn btn-danger" onclick="@(async () => await DeleteConfirm(@emp.EmployeeId))">Delete</button>
- </td>
- </tr>
- }
- </tbody>
- </table>
- if (isAdd)
- {
- <div class="modal" tabindex="-1" style="display:block" role="dialog">
- <div class="modal-dialog">
- <div class="modal-content">
- <div class="modal-header">
- <h3 class="modal-title">@modalTitle</h3>
- <button type="button" class="close" onclick="@closeModal">
- <span aria-hidden="true">X</span>
- </button>
- </div>
- <div class="modal-body">
- <form>
- <div class="form-group">
- <label for="Name" class="control-label">Name</label>
- <input for="Name" class="form-control" bind="@emp.Name" />
- </div>
- <div class="form-group">
- <label asp-for="Gender" class="control-label">Gender</label>
- <select asp-for="Gender" class="form-control" bind="@emp.Gender">
- <option value="">-- Select Gender --</option>
- <option value="Male">Male</option>
- <option value="Female">Female</option>
- </select>
- </div>
- <div class="form-group">
- <label asp-for="Department" class="control-label">Department</label>
- <input asp-for="Department" class="form-control" bind="@emp.Department" />
- </div>
- <div class="form-group">
- <label asp-for="City" class="control-label">City</label>
- <select asp-for="City" class="form-control" bind="@emp.City">
- <option value="">-- Select City --</option>
- @foreach (var city in cityList)
- {
- <option value="@city.CityName">@city.CityName</option>
- }
- </select>
- </div>
- </form>
- </div>
- <div class="modal-footer">
- <button class="btn btn-block btn-info" onclick="@(async () => await SaveEmployee())" data-dismiss="modal">Save</button>
- </div>
- </div>
- </div>
- </div>
- }
- if (isDelete)
- {
- <div class="modal" tabindex="-1" style="display:block" role="dialog">
- <div class="modal-dialog">
- <div class="modal-content">
- <div class="modal-header">
- <h3 class="modal-title">Delete Employee</h3>
- </div>
- <div class="modal-body">
- <h4>Do you want to delete this employee ??</h4>
- <table class="table">
- <tr>
- <td>Name</td>
- <td>@emp.Name</td>
- </tr>
- <tr>
- <td>Gender</td>
- <td>@emp.Gender</td>
- </tr>
- <tr>
- <td>Department</td>
- <td>@emp.Department</td>
- </tr>
- <tr>
- <td>City</td>
- <td>@emp.City</td>
- </tr>
- </table>
- </div>
- <div class="modal-footer">
- <button class="btn btn-danger" onclick="@(async () => await DeleteEmployee(emp.EmployeeId))" data-dismiss="modal">YES</button>
- <button class="btn btn-warning" onclick="@closeModal">NO</button>
- </div>
- </div>
- </div>
- </div>
- }
- }
Let us understand this code. At the top we have defined the route of this page as “/fetchemployee”. This means if we append “/fetchemployee” to the root URL of the app, we will be redirected to this page.
We are also inheriting EmployeeDataModel class, which is defined in EmployeeData.cshtml.cs file. This will allow us to use the methods defined in EmployeeDataModel class.
After this, we have defined a button to add a new employee record. When clicked, this button will open a modal popup to handle the user inputs.
We have also defined a searchbox and corresponding button to filter the employee records based on employee name. If you enter an employee name and click on the Filter button, it will show all the employee record for which the name matches the value entered in the field. If we click on the Filter button without entering any value in the search box, it will return all the employee records.
To handle the user inputs we are using a form. We are using a single form for both Add Employee and Edit Employee functionality. The form is defined in a modal popup and the modal popup is displayed on the screen based on the value of a Boolean property isAdd. The value of this Boolean property is set in the code behind (.cshtml.cs) page.
The City dropdown list inside the form is binding to our Cities table in the database with the help of cityList variable. The cityList will be populated as the application boots up.
The form will have a Save button which will invoke SaveEmployee method, defined in the code behind file to Add or update an employee record.
Similar to Add modal popup, we also have a Delete modal popup. It will be a read-only modal and ask for a confirmation to delete an employee record. Upon clicking “Yes”, it will invoke the DeleteEmployee method to delete the employee record.EmployeeData.cshtml.cs
Open EmployeeData.cshtml.cs and put the following code into it.- using System;
- using System.Collections.Generic;
- using System.Linq;
- using System.Threading.Tasks;
- using Microsoft.AspNetCore.Blazor;
- using Microsoft.AspNetCore.Blazor.Components;
- using Microsoft.AspNetCore.Blazor.Services;
- using ServerSideSPA.App.Models;
- using ServerSideSPA.App.Services;
- namespace ServerSideSPA.App.Pages
- {
- public class EmployeeDataModel : BlazorComponent
- {
- [Inject]
- protected EmployeeService employeeService { get; set; }
- protected List<Employee> empList;
- protected List<Cities> cityList = new List<Cities>();
- protected Employee emp = new Employee();
- protected string modalTitle { get; set; }
- protected Boolean isDelete = false;
- protected Boolean isAdd = false;
- protected string SearchString { get; set; }
- protected override async Task OnInitAsync()
- {
- await GetCities();
- await GetEmployee();
- }
- protected async Task GetCities()
- {
- cityList = await employeeService.GetCities();
- }
- protected async Task GetEmployee()
- {
- empList = await employeeService.GetEmployeeList();
- }
- protected async Task FilterEmp()
- {
- await GetEmployee();
- if (SearchString != "")
- {
- empList = empList.Where(x => x.Name.IndexOf(SearchString, StringComparison.OrdinalIgnoreCase) != -1).ToList();
- }
- }
- protected void AddEmp()
- {
- emp = new Employee();
- this.modalTitle = "Add Employee";
- this.isAdd = true;
- }
- protected async Task EditEmployee(int empID)
- {
- emp = await employeeService.Details(empID);
- this.modalTitle = "Edit Employee";
- this.isAdd = true;
- }
- protected async Task SaveEmployee()
- {
- if (emp.EmployeeId != 0)
- {
- await Task.Run(() =>
- {
- employeeService.Edit(emp);
- });
- }
- else
- {
- await Task.Run(() =>
- {
- employeeService.Create(emp);
- });
- }
- this.isAdd = false;
- await GetEmployee();
- }
- protected async Task DeleteConfirm(int empID)
- {
- emp = await employeeService.Details(empID);
- this.isDelete = true;
- }
- protected async Task DeleteEmployee(int empID)
- {
- await Task.Run(() =>
- {
- employeeService.Delete(empID);
- });
- this.isDelete = false;
- await GetEmployee();
- }
- protected void closeModal()
- {
- this.isAdd = false;
- this.isDelete = false;
- }
- }
- }
Let us understand this code. We have defined a class EmployeeDataModel that will hold all our methods that we will be using in EmployeeData.cshtml page.
We are injecting our EmployeeService to EmployeeDataModel class so that the client side methods can invoke our services.
The variables empList and cityList to hold the data from the Employee table and Cities table respectively. The variables are getting populated inside the OnInitAsync to make sure that the data is available to us as the page loads.
We will use the FilterEmp method to filter the employee data based on the employee name property. This property will ignore the text case of the search string and return all the records that match either fully or partially with the search string.
Clicking on “Add Employee” button will invoke the AddEmp method. It will initialize an empty instance of Employee model and set the value of isAdd Boolean flag to true. This will open a modal popup with a form, asking the user to enter a new employee record. Similarly, we have defined an EditEmployee method, which will fetch the record of the employee based on the employee id for which it is invoked. It will also set the value of isAdd to true to open the modal popup to edit the employee record.
The SaveEmployee method will check if it is invoked to add a new employee record or to edit an existing employee record. If the EmployeeId property is set then it is an “edit” request and we will invoke the Edit method of our service. If EmployeeId is not set then it is a “create” request and we will invoke the Create method of our service. We will then fetch the updated employee record by calling GetEmployee method and also set the value of isAdd to false, thus closing the modal popup.
The DeleteConfirm method is invoked by clicking the Delete button corresponding to an employee record. It will set the value of isDelete Boolean flag to true, which will display a Delete confirmation modal popup. Upon clicking YES inside this popup, DeleteEmployee method is invoked which will delete the employee record and set the isDelete Boolean flag to false to close the modal popup.Adding Link to Navigation menu
The last step is to add the link to our “EmployeeData” page in the navigation menu, open ServerSideSPA.App/Shared/NavMenu.cshtml page and put the following code into it.- <div class="top-row pl-4 navbar navbar-dark">
- <a class="navbar-brand" href="">ServerSideSPA</a>
- <button class="navbar-toggler" onclick=@ToggleNavMenu>
- <span class="navbar-toggler-icon"></span>
- </button>
- </div>
- <div class=@(collapseNavMenu ? "collapse" : null) onclick=@ToggleNavMenu>
- <ul class="nav flex-column">
- <li class="nav-item px-3">
- <NavLink class="nav-link" href="" Match=NavLinkMatch.All>
- <span class="oi oi-home" aria-hidden="true"></span> Home
- </NavLink>
- </li>
- <li class="nav-item px-3">
- <NavLink class="nav-link" href="fetchemployee">
- <span class="oi oi-list-rich" aria-hidden="true"></span> Fetch employee
- </NavLink>
- </li>
- </ul>
- </div>
- @functions {
- bool collapseNavMenu = true;
- void ToggleNavMenu()
- {
- collapseNavMenu = !collapseNavMenu;
- }
- }
This completes our Single Page Application using server side Blazor.
Execution Demo
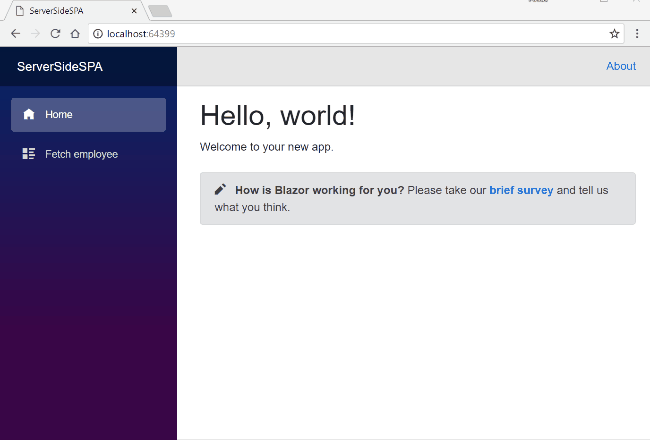
Press F5 to launch the application.A web page will open as shown in the image below. The navigation menu on the left is showing navigation link for Employee data page.


Click on Add Employee button to open “Add Employee” modal popup. Enter the data in all the fields and click on Save to create a new employee record.

This will create a new employee record and display the data in the View table. Add a few more records and the view will be similar as shown below.

Click on Edit button, it will again open the modal popup for editing the employee record. Edit the input fields and click on save to update the employee record.

To filter the records of the employee, enter the employee name in the search box and click on Filter button. The search text is case independent and the filter operation will return all the employee records matching the name entered in the search field. Refer to the image below.

If you click on the Delete button corresponding to the employee record, it will open a delete confirmation popup asking for a confirmation to delete the employee record.

Clicking on YES will delete the employee data and show the updated list of employees by refreshing the view table.
Conclusion
We have created a server-side Blazor application using Entity Framework Core DB first approach with the help of Visual Studio 2017 and SQL Server 2017. We used a modal popup to handle user inputs via a form and implemented the search functionality on the employee records.
Please get the source code from Github and play around to get a better understanding.
You can also read other articles on my personal blog here.See Also
- ASP.NET Core - Getting Started With Blazor
- Creating An SPA Using Razor Pages With Blazor
- Cascading DropDownList In Blazor Using EF Core
- ASP.NET Core - CRUD Using Blazor And Entity Framework Core
- Deploying A Blazor Application On IIS
Useful links
ASP.NET Core Blazor (Server Side ) 7.x-sqllite
https://github.com/medhatelmasry/ServerBlazorEF7