IdentityServer4实现单点登录统一认证
什么是单点登录统一认证:假如某公司旗下有10个网站(比如各种管理网站:人事系统啊,财务系统啊,业绩系统啊等),我是该公司一管理员或者用户,按照传统网站模式是这样:我打开A网站 输入账号密码 然后进入到A网站办点事,办完之后,我有需要到B网站去办点事,这个时候又需要输入账号密码,假如你还要到C网站办点事,又再需要输入账号密码。。。。。
为了解决这个问题,所以出现了单点登录统一认证:即 该改管理员 登录了其中一个网站得到了ids4的授权之后,他再登入该公司旗下其他网站的时候不需要在输入账号密码,能够直接进入后台办事! 这就是单点登录统一认证!
本文章目的:
使用IdentityServer4做一个单点登录统一认证的例子。我会用最简洁的代码和最能让新手懂的方式,来完成这个例子,不会像官方例子一样让新手看起来很吃力,因为我自己就体验过那种感觉^_^
1.用户访问一个MVC网站 A,A网站发现用户没有登录授权,然后跳转到ids4服务去登录
2.如果用户在ids4的登录页面上输入了正确的账号密码(从数据库某个用户表验证),则跳转回A网站,然后A网站就可以显示相关的内容
有兴趣爱好一起学习交流netcore相关技术的加群:275080612.另外本人博客:小彪博客 欢迎来交流!
前言:
博主为了研究ids4,把官方文档断断续续看了几遍,还有网上的很多大神文章都看了下,一句话,看的很累!一直没有找到这么纯粹又实用的例子,经过千难万苦的研究,终于有点成果,现在我决心把这些东西试着以最简单的方式写出来给大家参考,即使你是菜鸟跟着我的步骤来 你也能做出来!大神就忽略哈,如有指教或者建议,请留言!
开发环境:
vs2017 、net Core 2.1、sqlserver2012
一。搭建IdentityServer4服务端
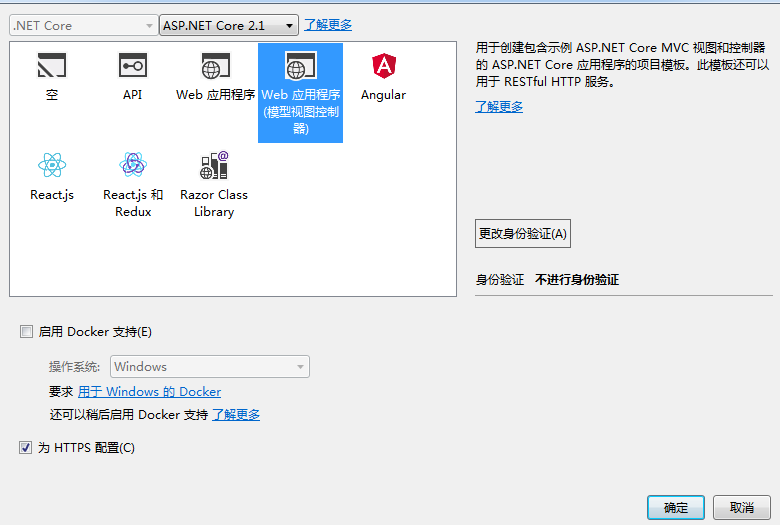
打开VS2017,新建 netcore项目:  名字叫:IdentityS4, 然后选择webMVC这个,如下图:
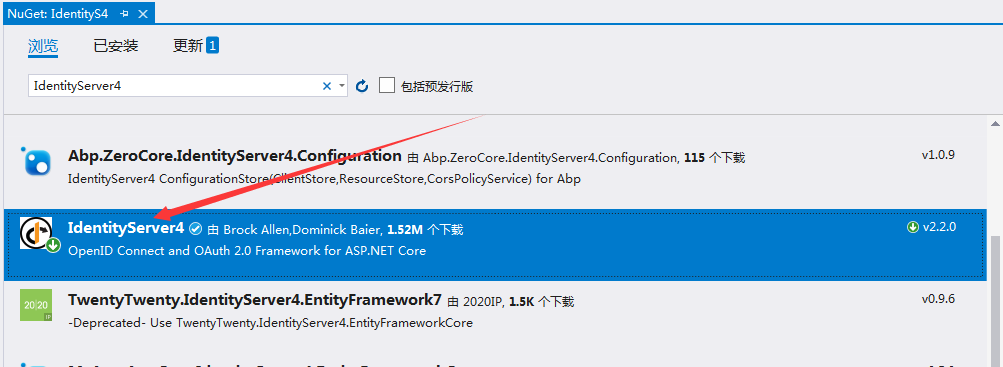
引进安装依赖项:IdentityServer4
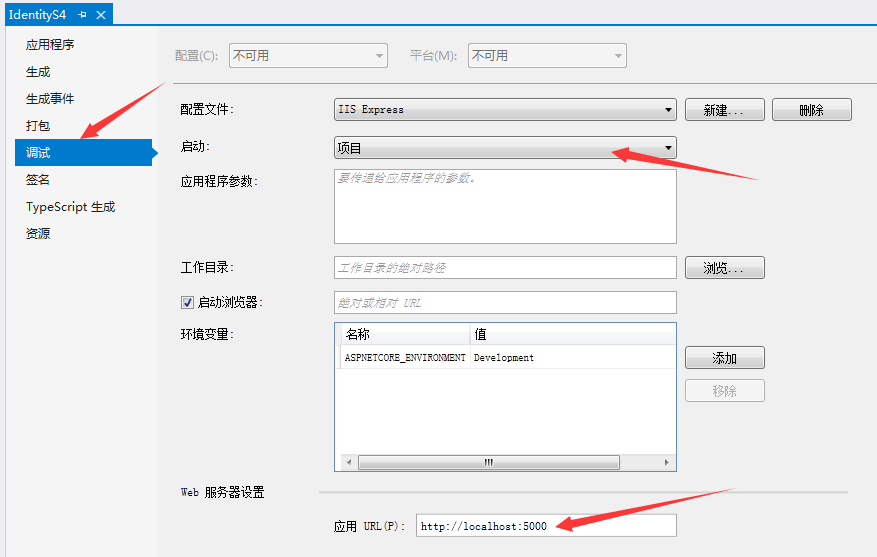
设置该项目的地址为:http://localhost:5000
新建一个配置文件类:Config.cs 代码如下:

public class Config
    {
        // scopes define the resources in your system
        public static IEnumerable<IdentityResource> GetIdentityResources()
        {
            return new List<IdentityResource>
            {
                new IdentityResources.OpenId(),
                new IdentityResources.Profile(),
            };
        }

        // clients want to access resources (aka scopes)
        public static IEnumerable<Client> GetClients()
        {
            return new List<Client>
            {
                // OpenID Connect隐式流客户端(MVC)
                new Client
                {
                    ClientId = "mvc",
                    ClientName = "MVC Client",
                    AllowedGrantTypes = GrantTypes.Implicit,//隐式方式
                    RequireConsent=false,//如果不需要显示否同意授权 页面 这里就设置为false
                    RedirectUris = { "http://localhost:5002/signin-oidc" },//登录成功后返回的客户端地址
                    PostLogoutRedirectUris = { "http://localhost:5002/signout-callback-oidc" },//注销登录后返回的客户端地址

                    AllowedScopes =//下面这两个必须要加吧 不太明白啥意思
                    {
                        IdentityServerConstants.StandardScopes.OpenId,
                        IdentityServerConstants.StandardScopes.Profile
                    }
                }
            };
        }
    }
在Startup.cs的ConfigureServices方法中注入Ids4服务,如下面红色部分代码:
public void ConfigureServices(IServiceCollection services)
        {
            services.AddMvc().SetCompatibilityVersion(CompatibilityVersion.Version_2_1);

            services.AddIdentityServer()//Ids4服务
                .AddDeveloperSigningCredential()
                .AddInMemoryIdentityResources(Config.GetIdentityResources())
                .AddInMemoryClients(Config.GetClients());//把配置文件的Client配置资源放到内存

        }
在Startup.cs的Configure方法中添加ids4服务中间件(注意要放在UseMvc之前就可以):
app.UseIdentityServer();
现在ids4本身的基本的配置弄好了,下面我们要开始弄跟数据库相关的东西了,大家想想,既然要登录,那肯定需要连接数据库并且读取出其中的用户信息去验证,比如账号、密码。好的,那我们就按照下面一步一步来做
添加DbContext类 名字叫:EFContext.cs ,代码如下(其中红色部分是我们待会需要添加的实体类,也就是对应数据库里面的用户表Admin):
public class EFContext : DbContext
    {
        public EFContext(DbContextOptions<EFContext> options) : base(options)
        {

        }

        #region 实体集

        public DbSet<Admin> Admin { get; set; }//注意 这里这个Admin不能写成Admins否则会报错找不到Admins 因为我们现在数据库和表是现成的 这里就相当于实体对应的数据库是Admin

        #endregion
    }
添加一个Admin.cs的实体类,对应数据库里面的用户表Admin (然后把这个实体类添加到上一步的EFContext中,也就是上一步代码的红色部分)
public class Admin
    {
        public int Id { get; set; }
        public DateTime CreateDate { get; set; }
        public string UserName { get; set; }
        public string Password { get; set; }
        public string Remark { get; set; }
    }
在Startup.cs的ConfigureServices方法中注入 EFContext,如下面红色部分代码:
public void ConfigureServices(IServiceCollection services)
        {
            services.AddDbContext<EFContext>(options=>options.UseSqlServer(Configuration.GetConnectionString("conn")));//注入DbContext

            services.AddMvc().SetCompatibilityVersion(CompatibilityVersion.Version_2_1);

            services.AddIdentityServer()//Ids4服务
                .AddDeveloperSigningCredential()
                .AddInMemoryIdentityResources(Config.GetIdentityResources())
                .AddInMemoryClients(Config.GetClients());//把配置文件的Client配置资源放到内存

        }
接下来,我们就要写Admin这个实体类跟数据库打交道的代码了,比如增删改查啊,在net中一般交DAL层,在netCore中 一般交services层,要注意的是 netcore的框架是IOC的框架,依赖注入的,所以这个services层需要接口的形式!
新建一个接口:IAdminService.cs 代码如下:
public interface IAdminService
    {
        Task<Admin> GetByStr(string username, string pwd);//根据用户名和密码查找用户
    }
新建实现该接口的类AdminService.cs
public class AdminService:IAdminService
    {
        public EFContext db;
        public AdminService(EFContext _efContext)
        {
            db = _efContext;
        }
        /// <summary>
        /// 验证用户,成功则返回用户信息,否则返回null
        /// </summary>
        /// <param name="username"></param>
        /// <param name="pwd"></param>
        /// <returns></returns>
        public async Task<Admin> GetByStr(string username, string pwd)
        {
            Admin m=await db.Admin.Where(a => a.UserName == username && a.Password == pwd).SingleOrDefaultAsync();
            if (m!=null)
            {
                return m;
            }
            else
            {
                return null;
            }
        }
    }
在Startup.cs的ConfigureServices方法中注入 service层,如下面红色部分代码:
public void ConfigureServices(IServiceCollection services)
        {
            services.AddDbContext<EFContext>(options=>options.UseSqlServer(Configuration.GetConnectionString("conn")));//注入DbContext
            services.AddMvc().SetCompatibilityVersion(CompatibilityVersion.Version_2_1);

            services.AddIdentityServer()//Ids4服务
                .AddDeveloperSigningCredential()
                .AddInMemoryIdentityResources(Config.GetIdentityResources())
                .AddInMemoryClients(Config.GetClients());//把配置文件的Client配置资源放到内存

            services.AddTransient<IAdminService,AdminService>();//service注入
        }
在配置文件appsettings.json中添加数据库连接字符串如下红色部分代码:
{
  "ConnectionStrings": { "conn": "server=.;database=blogcore;uid=sa;pwd=123" },
  "Logging": {
    "LogLevel": {
      "Default": "Warning"
    }
  },
  "AllowedHosts": "*"
}
至此,应该是可以正确的连接数据库的,大家可以去Home控制器中查询点数据测试下显示到首页,保证能连接数据库成功的查询出数据就可以。
接下来 我们来做登录页面
新增一个控制器AccountController,代码如下:
public class AccountController : Controller
    {
        private IAdminService _adminService;//自己写的操作数据库Admin表的service
        private readonly IIdentityServerInteractionService _interaction;
        private readonly IClientStore _clientStore;
        private readonly IAuthenticationSchemeProvider _schemeProvider;
        private readonly IEventService _events;
        public AccountController(IIdentityServerInteractionService interaction,
            IClientStore clientStore,
            IAuthenticationSchemeProvider schemeProvider,
            IEventService events,
            IAdminService adminService)
        {
            _interaction = interaction;
            _clientStore = clientStore;
            _schemeProvider = schemeProvider;
            _events = events;
            _adminService = adminService;
        }

        /// <summary>
        /// 登录页面
        /// </summary>
        [HttpGet]
        public async Task<IActionResult> Login(string returnUrl=null)
        {
            ViewData["returnUrl"] = returnUrl;
            return View();
        }

        /// <summary>
        /// 登录post回发处理
        /// </summary>
        [HttpPost]
        public async Task<IActionResult> Login(string userName, string password,string returnUrl=null)
        {
            ViewData["returnUrl"] = returnUrl;
            Admin user = await _adminService.GetByStr(userName, password);
            if (user!=null)
            {
                AuthenticationProperties props= new AuthenticationProperties
                {
                    IsPersistent = true,
                    ExpiresUtc = DateTimeOffset.UtcNow.Add(TimeSpan.FromDays(1))
                };
                await HttpContext.SignInAsync(user.Id.ToString(), user.UserName, props);
                if (returnUrl!=null)
                {
                    return Redirect(returnUrl);
                }

                return View();
            }
            else
            {
                return View();
            }
        }
    }
添加登录view视图,代码如下:
@{
    Layout = null;
}

<!DOCTYPE html>

<html>
<head>
    <meta name="viewport" content="width=device-width" />
    <title>Login</title>
</head>
<body>

    <div align="center">
        <h1>统一认证登录中心</h1>
        <form action="/Account/Login" method="post">
            用户名:<input type="text" name="userName" /><br />
            密 码:<input type="password" name="password" /><input type="hidden" name="returnUrl" value="@ViewData["returnUrl"]" /> <br />
            <input type="submit" value="登录" />
        </form>
    </div>
</body>
</html>
至此,IdentityServer4服务端的工作完成,接下来我们要开始建客户端了,也就是需要保护的MVC网站
二。搭建客户端
新建一个名为 MvcClient 的
把地址设置为:http://localhost:5002
在Startup.cs的ConfigureServices方法中添加如下红色部分代码(主要用来配置认证中心ids4的及自己作为客户端的认证信息):
public void ConfigureServices(IServiceCollection services)
        {
            JwtSecurityTokenHandler.DefaultInboundClaimTypeMap.Clear();

            services.AddAuthentication(options =>
                {
                    options.DefaultScheme = "Cookies";
                    options.DefaultChallengeScheme = "oidc";
                })
                .AddCookie("Cookies")
                .AddOpenIdConnect("oidc", options =>
                {
                    options.SignInScheme = "Cookies";

                    options.Authority = "http://localhost:5000";
                    options.RequireHttpsMetadata = false;

                    options.ClientId = "mvc";
                    options.SaveTokens = true;
                });


            services.AddMvc().SetCompatibilityVersion(CompatibilityVersion.Version_2_1);
        }
在 Configure方法中添加这行代码(需要在UseMvc之前就可以):
app.UseAuthentication();
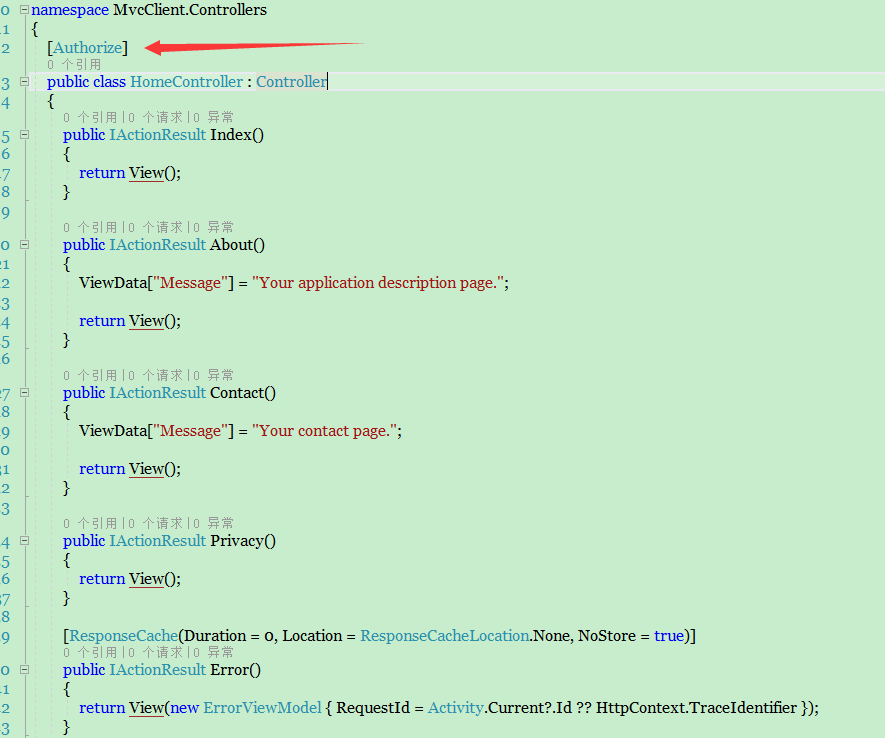
到此,客户端跟统一认证的信息就配置完了。接下来我们把Home控制器上面加上需要验证的标志:[Authorize]
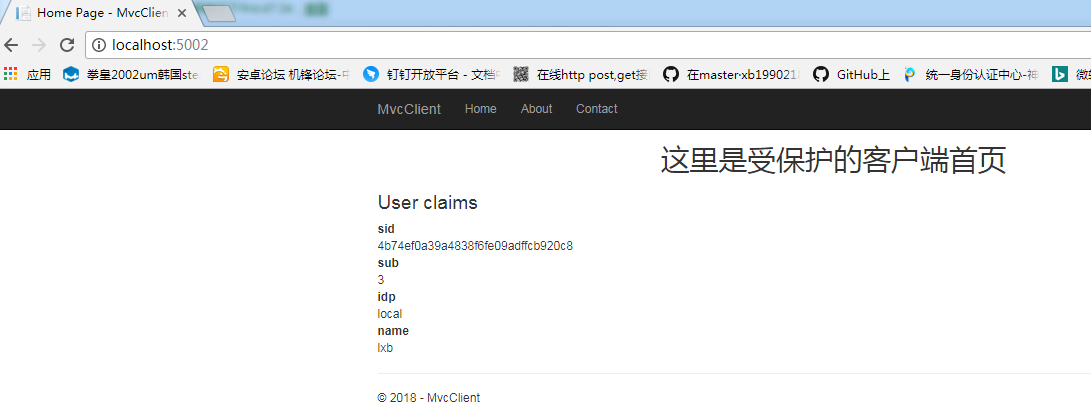
我们把默认的Index视图页面html代码去掉,改成如下(主要用来显示下授权后拿到的用户信息):
@{
    ViewData["Title"] = "Home Page";
}

<div align="center"><h1>这里是受保护的客户端首页</h1></div>
<h3>User claims</h3>

<dl>
    @foreach (var claim in User.Claims)
    {
        <dt>@claim.Type</dt>
        <dd>@claim.Value</dd>

    }
</dl>
到此,客户端的工作也做完了,下面我们要开始启动项目了
设置项目为多项目启动:解决方案上右键-属性
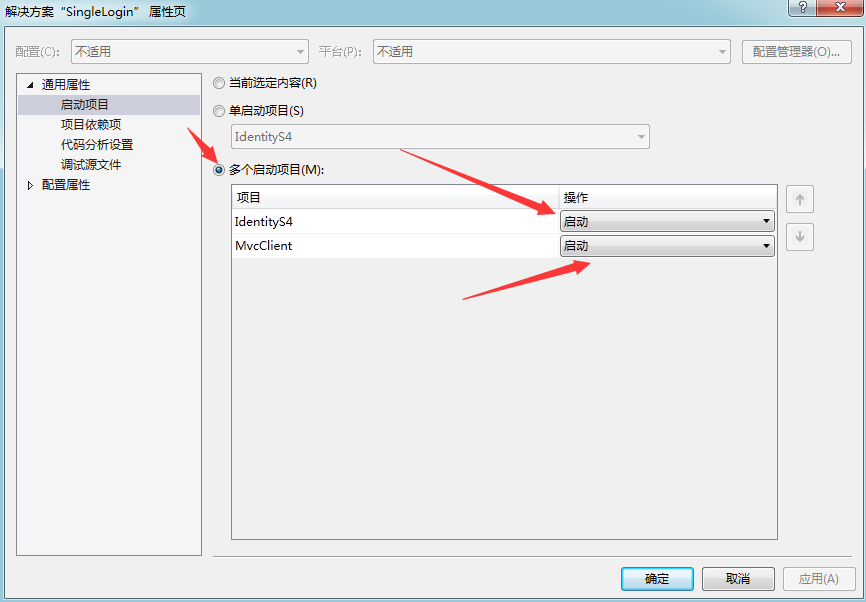
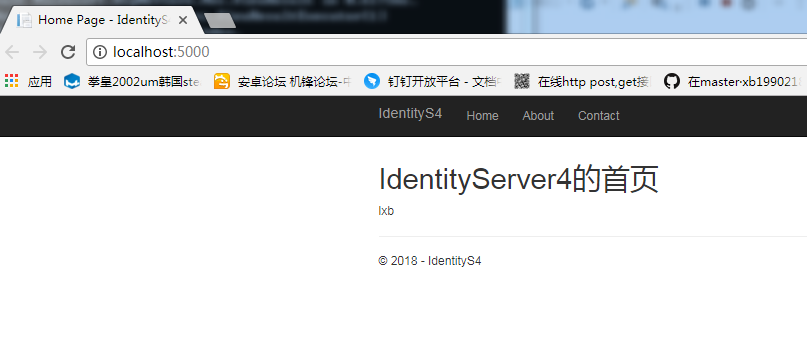
现在我们启动项目:服务器项目和 客户端都运行了,但是客户端会直接跳转到服务端登录页面
服务端
客户端(5002)跳转过来的登录页面:
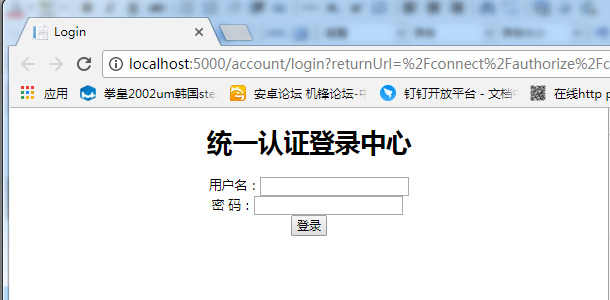
然后输入正确账号密码 点击登录认证通过之后就跳转回 客户端网站去了
至此 ,例子结束!
从这个例子中,咱们可以再加几个客户端网站,然后统一到这个ids4认证,这样就达到了单点登录统一认证的效果了!
源码下载:https://pan.baidu.com/s/1HRiAF7LMinCh03AZNArfcQ