How to Generate Signed Apk in Android Studio version:2020.3.1 for windows?
OS:windows 10 pro
Android Studio version:2020.3.1 for windows
Create a new project in Android Studio
Change Minimum Sdk Version In Android Studio
生成Release包: Build > Select Build Variant select release
Android系统会将所有的APK文件识别为应用程序的安装包,类似于windows系统上的exe文件。

Part 1:Create a new project in Android Studio
Create a new project in Android Studio, go to File ⇒ New Project and fill all required details to create a new project.
Part 2:Prepare your application for release before generate an .apk file.
configure app information,
step 1:Change Minimum Sdk Version In Android Studio
There are two methods that can change the android SDK version in android studio.
1.1 Change in android studio project build.gradle File.
Select Project in android studio Project view.
Edit <project-name>/app/build.gradle file.
Change minSdkVersion and targetSdkVersion in the right panel. You can search for it if you can not find it immediately.
1.2 Change in android studio project structure dialog.
Click the android studio menu ” File —> Project Structure “.
In the Project Structure dialog, select the app in the Modules list on the left side.
Select the Flavors tab on the right panel, click the defaultConfig item in the dialog center, then you can select your desired android Min Sdk Version and Target Sdk Version from the related dropdown list.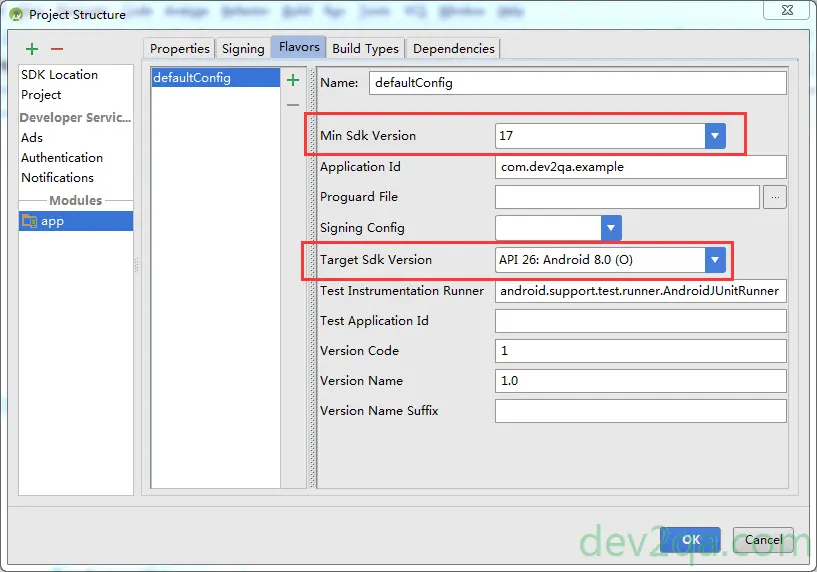
Click the OK button to save the selection.
Click the ” Build —> Rebuild Project ” menu item to rebuild the android project.
This time the build.gradle file will be changed by android studio automatically.
output
app/build.gradle
F:\developer_AndroidStudio\smsverificationcodeforwarder\app\build.gradle
plugins {
    id 'com.android.application'
}

android {
    compileSdk 31

    defaultConfig {
        applicationId "com.example.smsverificationcodeforwarder"
        minSdk 30
        targetSdk 31
        versionCode 1
        versionName "1.0"

        testInstrumentationRunner "androidx.test.runner.AndroidJUnitRunner"
    }

    buildTypes {
        release {
            minifyEnabled false
            proguardFiles getDefaultProguardFile('proguard-android-optimize.txt'), 'proguard-rules.pro'
        }
    }
    compileOptions {
        sourceCompatibility JavaVersion.VERSION_1_8
        targetCompatibility JavaVersion.VERSION_1_8
    }
    buildFeatures {
        viewBinding true
    }
 +   compileSdkVersion 30   <!--here-->
}

dependencies {

    implementation 'androidx.appcompat:appcompat:1.2.0'
    implementation 'com.google.android.material:material:1.3.0'
    implementation 'androidx.annotation:annotation:1.2.0'
    implementation 'androidx.constraintlayout:constraintlayout:2.0.4'
    implementation 'androidx.lifecycle:lifecycle-livedata-ktx:2.3.1'
    implementation 'androidx.lifecycle:lifecycle-viewmodel-ktx:2.3.1'
    testImplementation 'junit:junit:4.+'
    androidTestImplementation 'androidx.test.ext:junit:1.1.2'
    androidTestImplementation 'androidx.test.espresso:espresso-core:3.3.0'
}
step 2:
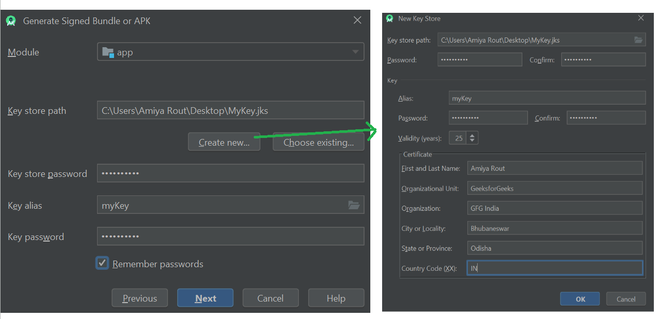
Part 3:Generate Signed Bundle or APK
Step 1: Go to Build -> Generate Signed Bundle or APK, a pop up will arise. Choose APK in the pop-up and click on Next.
使用AndroidStudio生成正式签名
Build—>Gencrate Signed APK


弹出如下窗口,选择生成APK


Step 2: After completing step 1, if you already have a key, make sure you just refer to that and you can release the version of that app but in case if it is the first time it is recommended to create a new key. After creating a new key click on OK and then click on Next.

Step 3: After clicking Next in the next pop-up make sure to choose release as Build Variants and check the two Signature Versions as well. Then click on Finish.
选择APK生成路径,Finish!
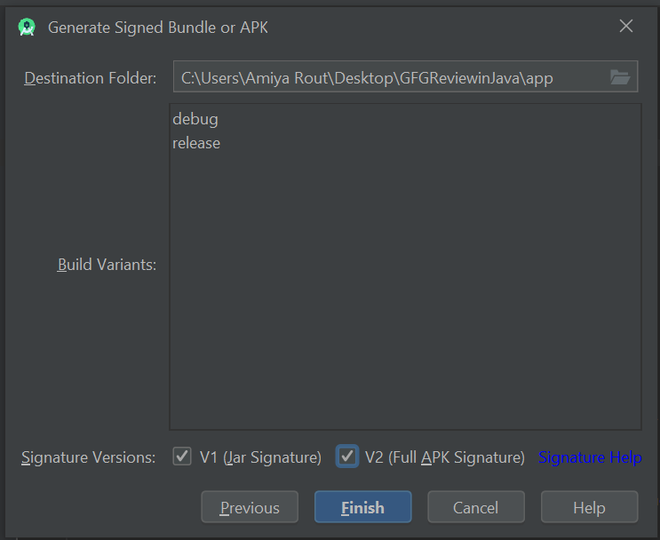

签名方案选择

填写相关信息,ok

Step 4: After successfully completed these steps you can locate your signed apk at app -> release -> app-release as your apk file.

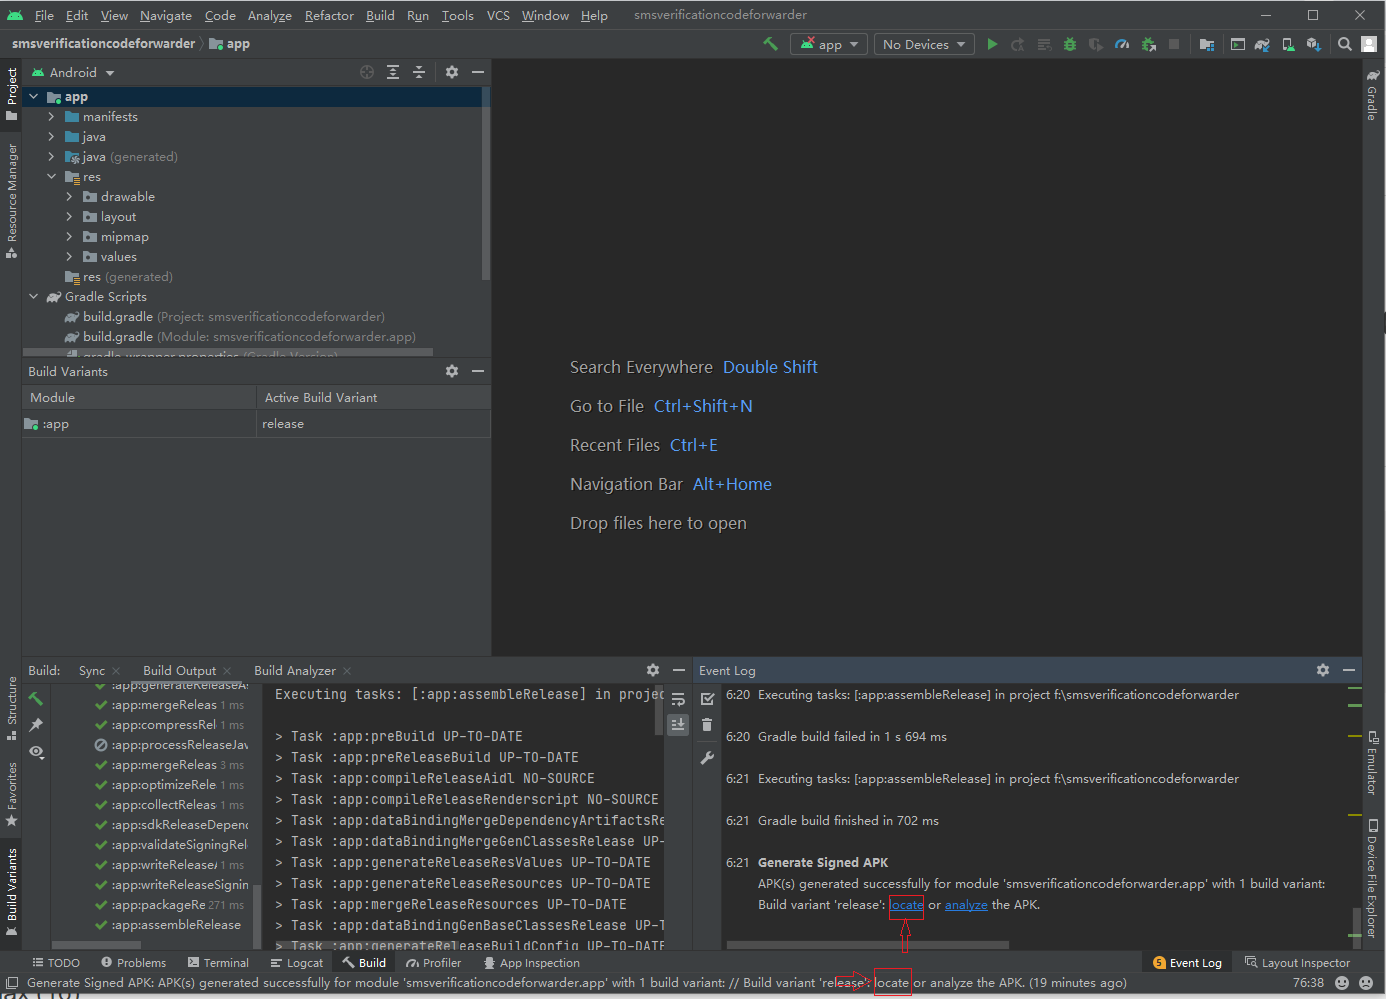
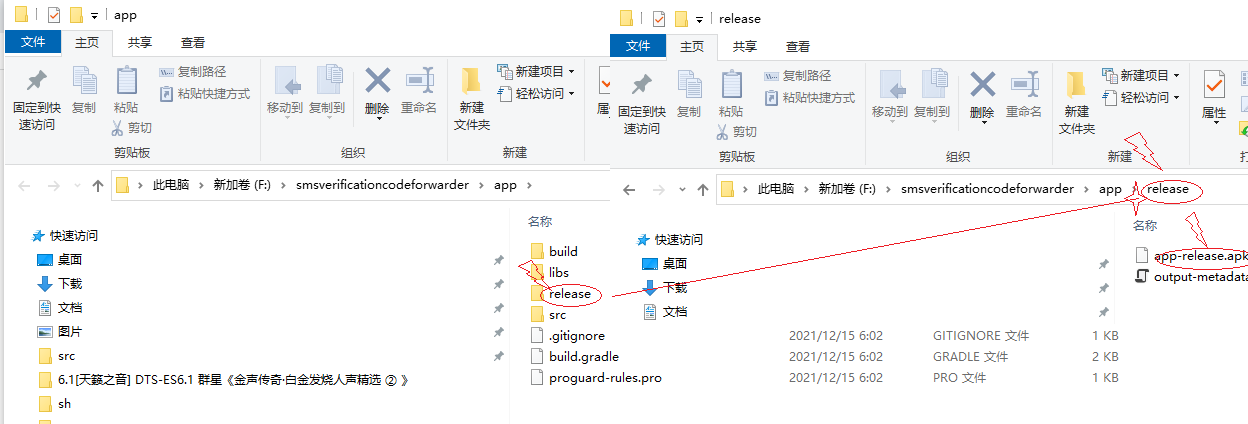
apk path locate
F:\smsverificationcodeforwarder\app\release
F:\smsverificationcodeforwarder\app\release\app-release.apk
your project home dir\app\release\filename.apk
Useful links
https://www.geeksforgeeks.org/how-to-generate-signed-apk-in-android-studio/